Hey all!
I've decided to get the very last blog of the semester done early so I can concentrate on finals.
I anticipate that this week I will mostly work on my final paper. I have been working on this project for an entire calendar year and I feel like it paid off. I now appreciate how a graduate student genuinely needs to spend at least a year on one research topic to thoroughly understand it. I'm planning on changing my topic next semester but will miss my endophytes.
I will miss all the S-STEM people while on break. I hope that most, if not all, of you will be back next semester.
Happy Holidays!
Thursday, December 3, 2015
Fall 2015 Week 13
This week in lab has been spent counting the sprouted seeds for the allelopathy project I'm doing with Matt.
Last week I counted seeds into petri plates and poured a 10% solution of composted leaves and water over the plates. We are testing to see if the chemicals that prevent germination of the seeds in the leaves can be degraded with composting. If the chemical is degraded then there will be no statistical difference between the plates that were watered with leaf extract and those watered with de-ionized water.
This week I counted all the sprouted seeds. Most of the sprouts were twisted around each other making them very hard to count. There is still more calculations to do but from the rough data gathered on Tuesday it looks like composting degraded the allelopathic chemicals.
Thursday, November 19, 2015
Fall 2015 Week 11
This week in lab I haven't done much on my endophyte project. I transferred very small squares of mycelium from the original test plates to plates that have fewer biological controls so I can characterize them.
The rest of the week I worked with Matt on the allelopathy project we have been doing. Some plants have compounds in their leaves that, when they fall to the ground, prevent seeds in the neighboring area to not germinate to lower the competition for resources. We are composting leaves that we know to have allelopathic traits and seeing if the chemicals prevent various seeds to germinate. So I spent all week counting seeds into petri plates in preparation of this experiment.
Friday, November 13, 2015
Fall 2015 Week 10
I ran my last sterilization experiment of the semester this week in lab. The grass plates I made weeks ago are as sterile as the day I put them in my cabinet and so I decided to go ahead with the procedure I used on the grass. This was a summary of my procedure:
This time I varied the times I soaked the silver leaved nightshade leaves in bleach to see if it had any affect. I soaked the leaves in bleach for 5 minutes, 6 minutes, 8 minutes, 10 minutes, and 15 minutes. Things began to grow on most of the plates by Thursday and by today the growth was dense enough to see without squinting. WHAT DOES THIS MEAN? I have no clue, Cori has no clue, Matt has no clue. So I'm just going to characterize this fungi for my project. Its everywhere on these plants.
To characterize the fungi I will use their distinctive characteristics when growing on petri plates, lumpy green with white mycelium on the fringes:
- Rinse leaves in running tap water for 5 minutes to remove any debris or dirt
- Soak leaves in 75% ethanol for 30 seconds
- Soak leaves in 4% bleach for 5 minutes
- Soak leaves in 75% ethanol for 30 seconds to rinse any residual bleach from the leaves
- Cut the leaves in to small squares and put pieces in a petri plate
This time I varied the times I soaked the silver leaved nightshade leaves in bleach to see if it had any affect. I soaked the leaves in bleach for 5 minutes, 6 minutes, 8 minutes, 10 minutes, and 15 minutes. Things began to grow on most of the plates by Thursday and by today the growth was dense enough to see without squinting. WHAT DOES THIS MEAN? I have no clue, Cori has no clue, Matt has no clue. So I'm just going to characterize this fungi for my project. Its everywhere on these plants.
To characterize the fungi I will use their distinctive characteristics when growing on petri plates, lumpy green with white mycelium on the fringes:
I will also look up any biochemical tests I could possibly do to narrow the search to a genus of fungi I'm working with.
Thursday, November 5, 2015
Fall 2015 Week 9
This week in lab there has been no growth on my grass species plates, indicating the sterilization procedure is working for the grass. Growth of the gray mold is significantly quicker than the week I've given it, with noticeable mycelium by day 3 or 4. Next week I plan on using the same concentrations of alcohol and bleach but letting the silver leaved nightshade leaves sit longer than 5 minutes so the bleach penetrates the trichomes.
While waiting to see results from my grass plates I have been working more with my unknown bacteria. To even begin to classify a bacterium species one must know the cell shape, whether it is Gram positive or negative, and the organism's oxygen requirements. The first two pieces of information can be deciphered using Gram staining but the last is a requires other tests.
To test if a bacterium is capable of growing in oxygen free environments, two test chambers are prepared. The first is in a giant pickle jar with a burning candle that will use up the oxygen in the container. Only a very small amount of oxygen can get in through the edges of the lid making an environment most suitable to microaerophiles: bacteria that like a very specific, low level of oxygen.
The other test is a box with a pouch of chemicals that use up the all the oxygen in the box, while producing carbon dioxide. This creates an environment that only strict anaerobes or facultative anaerobes can live in. Strict anaerobes are bacteria that can only live in oxygen free environments, which I know I don't have because my bacteria was growing fine on my plates in open air. Facultative anaerobes are bacteria that can switch from oxygen rich environments to oxygen poor environments.
And as a bonus a photo of my bacterium Gram stain under the microscope:
Thursday, October 29, 2015
Fall 2015 Week 8
This week was the club Halloween fundraiser thingy so I wasn't in lab much.
On Tuesday 10/27 I did do one sterilization experiment, using the endophyte infected grass I've been growing in the plant incubator. The sterilization procedure I used for my last experiment was formulated specifically for grass species, and if I know for sure that my grass has been grown from endophyte infected seeds, then I should be able to grown something besides gray mold.
When looking at the silver leaved nightshade under the microscope there are dense trichomes on the surface of the leaf. Trichomes are fine growths on the surface of many plants that can serve many functions. They look like silver hairs protecting delicate plant tissue from harsh sunlight. They can also help prevent loss of water by creating a small bubble of moister air near the surface of the leaf. This is clearly on advantage in the desert where silver leaved night shade lives. Incidentially it is the dense mat of trichomes on SNS that gives it its name. Here is a photo of the SNS leaves under the microscope. The triangular snowflake structures are the trichomes.
I figure If I can get something besides contamination to grow on my grass I know that the procedure works and I simply need to let the silver leaved night shade soak in bleach a little longer to get it to penetrate between the trichomes of the leaf.
Thursday, October 22, 2015
Fall 2015 Week 7
Some of the literature about endophytes I've read in the past have said more diversity can be found if plant metabolites are on the petri plates. So a few weeks ago I ran an experiment where I blended up some S. eleaegnifolium leaves, strained the slurry and poured the liquid on petri plates filled with PDA, rose bengal dye and streptomycin to see if I could grow anything other than the usual fungi.
Unfortunately I forgot to surface sterilize the leaves I blended up but I did grow something really interesting. On my plates were small, rounded, sticky looking, creamy white colonies that could have been either bacteria or yeast. I isolated it to a few different media but it only grew well on the TSA plate. Here's what it looked like after a few days:
But it's way cooler now:
I did a gram stain and found out the organism is a gram positive bacillus bacterium. This is especially interesting because the streptomycin on the plates I make is supposedly broad spectrum enough to kill most bacteria. The plates were made in April so maybe the antibiotics degrade, I thought. I made a streak plate of 4 different bacteria species I knew to be susceptible to streptomycin on one of the last plates and nothing grew. I assumed both that my antibiotics were working and the bacterium was immune to streptomycin. Then I did an antibiotic test plate with four different antibiotic disks: Streptomycin, vancomycin, penicillin and chloraphenicol. Here's what I found:
Everything except penicillin has a zone of inhibition. WHAT? Not what I expected. The concentration of the antibiotic disk was 10 micrograms, about what the concentration in the agar should have been. I looked back in my notebook and guess what? I diluted my streptomycin to about 1/10 of the strength I thought it was. Decimals are hard to keep track of. So now I know those plates were not exactly what I thought but they did their job well enough while I used them. Interesting.
Thursday, October 15, 2015
Fall 2015 Week 6
This week in lab I ran another sterilization experiment. This time I followed a protocol exactly. I soaked the nightshade leaves in 75% ethanol for three min then in 4% bleach for 5 minutes then ethanol again for 45 seconds. I made nine plates, the more specimens the more data to look at, and have begun to keep careful track of the how things grow on the plates using an Excel spread sheet.
I've found that, once again, within a few days I'm seeing significant fungal growth on all my plates. Its early to know for sure, but I'm pretty sure its the same green-grey mold stuff I've been growing all semester. I'm going to try a few more experiments to attempt to isolate the source of the contamination. I will try plating the tap water I'm rinsing the leaves in as well as test my glassware. I will also think about increasing either the concentration of the bleach or the amount of time spent soaking in the bleach solution.
Another thing I want to try is sterilizing the grass I'm growing that, according to the package, has endophytes in the leaves. If I can isolate endophytes from there I know I'm on the right track.
This is a picture of all the plates I made Spring 2015. They are arranged by decreasing times of sterilization, the first row being 10 minutes and the last being unsterilized. This photo shows that many different kinds of fungi are growing on unsterilized leaves and almost nothing is growing on the longer sterilization times.
Thursday, October 8, 2015
Fall 2015 Week 5
This week in lab I did a lot of little tasks to maintain my experiments. I made more media (I simultaneously feel that I don't use my media fast enough and that I spend all my time making media), I replanted endophyte infected grass seeds, took some photos off the lab camera and diluted alcohol (though I now realize I should have made more bleach too).
The plates I made last week testing the sterility of different bleach concentrations were over run with contamination as well. All of the plates had the same green/black mold as before, no matter how high the bleach concentration. I'm beginning to feel frustrated.
Next week I plan on using a sterilization technique I found using 75% ethyl-alcohol and 4% bleach solution-way stronger than any I've used before. They say to dip the plant tissue in alcohol, then bleach, then alcohol again. Apparently the second alcohol dip removes some of the bleach residue, which could be one reason my original experiment with 1.25% bleach did not grow anything at longer sterilization times.
Contamination or not?
Thursday, October 1, 2015
Fall 2015 Week 4
Lab has been so productive this week!
On Thursday (9/24/2015) I ran an experiment using the alcohol sterilization method I've been working with all summer on silver leaved nightshade leaves (S. elaeagnifolium). Four days later I knew there was a problem. On Monday I came back to lab and noticed that quadrants A-D all had 1-2 cm sized green, hilly fungal colonies growing on them, which is far too rapid of growth for endophytes. Quadrant H also had a fungi growing on it that appeared similar to the one that digested my dead grasshopper. All the fungi were growing directly on the leaf suggesting it wasn't contamination introduced because of me but living on the surface of the plant. Based on the physical characteristics of these fungi, I believe they are species I've grown before.
I decided I needed to take a look at my chosen sterilant, 100% ethyl alcohol. When I asked Cori she said that, contrary to assumption, alcohol is a disinfectant not a sterilant, and even then it actually works better with a little water. Thus 70% alcohol is a better disinfectant than 100%. Clearly this isn't going to work the way I thought. I went back to the literature and decided to use bleach again, in the same manner as most current research. Last semester I had a problem with 1.25% bleach killing everything, including potential endophytes, so to find a concentration to work with in the future, I decided to make multiple strength bleach solutions and test which concentration would surface sterilize without penetrating the interior of the leaf. I await conclusive results but nothing has grown on any plates yet, a good sign.
I need to take more photos of my plates so I can remember what these fungi look like, even if they are contaminates. If I remember correctly the microscope photos I took were of spores from green contaminates I grew over the summer.
I made some photos of my plates. This is what I keep growing that looks like contamination:
This is what looks like the same thing that ate the grasshopper: It has the same black spores that bunch in heads and white mycelium.
Wednesday, September 23, 2015
Fall 2015 Week 3
This week in lab I took pictures of possible endophytes in the leaves of silver leaved nightshade using a video equipped light microscope. I am attempting to compile some form of photo identification library for endophytes but am wondering if this is too large a scope for this project. Either way I need photos of my fungi in their native habitat so I will continue this for awhile.
One thing I've been struggling with while making my wet mount slides is the density of the leaves I'm looking through. They are so thick not much light is able to shine through making the photos dark and the structures indistinct. Also at very high magnifications small bumps and waves on the thick surface of the leaves translate to huge changes in elevations under the microscope. This means that to see the structure of a three dimensional object, such as a fungus inside a trichome, I have to adjust the fine focus of the microscope to get an idea of the structure. While this may be just a feature of using a microscope, I want to see what kinds of solutions I can come up with to make it easier for me to take 2 dimensional photos of 3 dimensional things. I am soaking a leaf in acetone to clear it and see if it makes it easier to see through the leaves.
Thursday, September 17, 2015
Fall 2015 Week 2
This week in lab has been focused on introspection. Despite long hours contemplating, and many more hours at the bench learning techniques for it, I'm not entirely satisfied with my project. I'm finding it hard to stay motivated studying fungi when my mind so readily wanders to insects instead.
I want to change the topic of my project but I've already invested heavily in my current project. However I'm not entirely sure what a good, viable insect based project would look like. Thus I would be spending a large chunk of my time floundering around looking for a topic and learning completely new techniques before being able to really start a new project. The semester is already getting old...
A compromise would be to have a small side project, such as building an insect terrarium, to keep me occupied while I finish out my project. My endophytes are a great project with so much potential for growth, both personal and within the project. I'm just so uncertain.
I also moved my lab cabinet so I can access my supplies even when there's class. Here's a photo of all my lab supplies:
Saturday, September 12, 2015
Fall Week 1
How time flies! School has been in session for nearly three weeks, all my classes are now in full swing and I'm finally getting back into the rhythm of things.
Most of this week has been spent catching up with all the lab people and getting to know some new faces. Other than that I've been using the light microscope to try and find endophytes in silver leaved night shade leaves before sterilizing and plating them. It hasn't been as easy as during the summer because the health status of the individuals I'm taking samples from keeps changing. First I thought they were all completely dried out and dead but, now my brother has started to water the front lawn, where these plants grow, there are tons of healthy, unstressed plants without endophytes. I feel like I need to control their growing conditions more stringently.
Here is a photo of Silver leaved nightshade or Solanum elaeagnifolium:
Tuesday, August 11, 2015
Summer Week 12
This week I have not been in lab. I haven't even been in Phoenix for over a week. Hurray!!!
Instead of sitting in a boring, stuffy lab all day (haha not really), I have been running all around Colorado. My friends Luke and Jason moved here over two years ago and this is the first time I've seen them since then. Its been so great getting caught up with them and adventuring around Colorado.
I'm looking forward to getting back in the lab when school starts again. For now, here is a photo of beautiful Boulder:
Sunday, August 2, 2015
Summer Week 11
I'm doing my blog early this week because I'm headed to Denver WOOT!
I anticipate most of my time will be spent working on my final project. Thankfully the structure of my project is similar to the one I did in the Spring, so much of the background information and literature citations do not need to be reexamined.
One thing that I've been more concerned about since looking at my past research is my sterilization method. Most of the literature concerning endophytes says to use a low concentration of sodium hypochlorate, bleach, to sterilize the surface of plant tissues. I, however, found that the bleach was so caustic that it killed all possible endophytes.
In this table from Spring 2015 shows what kinds of fungi I grew based on how long I soaked the tissues in bleach. C means contaminate, + means possible endophyte and - means no growth at all.
As can be seen after even one minute of soaking in bleach nothing is growing on my plates. There are two possible explanations for this: the bleach solution used last semester was incorrectly diluted making it more concentrated than expected, or bleach is caustic to fungi at any concentration.
I have been getting better results using 100% ethanol for 5 minutes but have only found one other paper that uses exclusively ethanol, which makes me wary...
Saturday, August 1, 2015
Summer Week 10
This week in lab has been spent in contemplation of my summer. As it nears to an end, and I begin to write my final paper, I am compelled to think about all I have accomplished:
- Staining plant tissues to identify endophytes microscopically
- Perfecting my sterilization technique to include the laminar hood
- Moving my fungi from bengal agar to potato dextrose agar
- Using tape mounts to stain fungal structures
- Using super cooled ethanol to freeze dry fungal tissues
- Extracting DNA with a kit
I certainly have had a productive summer. But I think the most important thing I did this summer was sit down and discuss with Cori how to organize my data. I have been struggling with this since I got into this program. What to write down and in what format. Cori really helped me understand how it is people in labs organize data and helped me make more sense of my lab notebook. She's a great mentor
This is a video showing my freeze drying setup
Friday, July 24, 2015
Summer Week 9
This week in lab was spent learning to make microscope tape mounts. This is another, superior way of staining fungal cultures for investigation under the microscope.
When making a normal wet mount slide from a culture grown in a dish a researcher will scrape a small sample off the colony. Unfortunately this distorts the morphology of the mycelium, and bunches the sample into a mass, making observations fuzzy at best.
With tape mounts this frustration is eliminated. Instead of scraping the colony, a strip of tape is gently pressed against the top of the petri plate, preserving the shape of the specimen.
Here are some photos of a colony that was sporulating:
Thursday, July 23, 2015
Summer Week 8
For the first time in my life I extracted DNA! Naturally, I started with one of the most notoriously difficult organisms to extract DNA from- fungi. Fungi are similar to plants in that their structure and support comes from rigid cell walls. However, in fungi the macro-molecule that the cell wall is made of is usually chitin instead of cellulose.
These macro-molecules must be broken down to extract any DNA, which is difficult because of how tough they are. Broadly, there are two ways to break down the cell walls; chemical or mechanical. Chemical degradation of the cell walls would be things like adding enzymes whereas mechanical is more grinding of samples or vortexing with glass beads to shred the walls. The method I used did a little of both.
To make grinding easier and more productive I flash froze mycelium samples in a bath of super cooled isopropyl alcohol. This makes the cytoplasm freeze and the walls brittle so grinding with a pestle is easier. After that I used an E.Z.N.A. Fungal DNA extraction kit that was full of buffers to further degrade the cell walls. I ran a gel on my resulting DNA, popped it in the UV viewer, and this is what I got:
Thursday, July 9, 2015
Summer Week 7
This week in lab I did a variety of things.
I've noticed in the past that the agar in my petri plates will dry out and crack, a process called desiccation. To prolong the life of my endophytes, I have decided to move cultures to new plates. Because I no longer need to select against any bacteria or fast growing fungi I have decided to move my cultures to plates filled with straight potato dextrose agar, no antibiotics or rose bengal dye. So on Monday I made PDA and filled my plates with it.
On Tuesday I moved my cultures. I have also noticed that some of my plates will grow a black fungal contaminate which I assume is coming from the air. To prevent this from happening again I used the laminar hood when moving my cultures. Hopefully by sterilizing the air with UV light there will not be any contamination on my newest plates.
Tuesday, July 7, 2015
Summer Week 6
This week in lab I spent a lot of time staining the fungi that I've grown to identify morphology and hopefully the species.
I have been using lactophenol cotton blue dye in accordance with a protocol from Leck (1999). It is a relatively simple protocol, you basically just add dye to a sample on a slide, but I was really struggling with it. The samples of mycelium I was taking from my plates were too small at first, then they were too thick and only a small portion of the sample absorbed dye.
Finally, after much trail and error, I was able to get a sample clear enough to see structures. The trick was to use dissecting needles to tease out the mycelial mat and wait five min for the dye to absorb into the cell walls. I also discovered that the commassie blue dye works about as well as the lactophenol cotton blue and is a less toxic compound, so I may begin to use that more.
Preparation of Lactophenol Cotton Blue Slide Mounts:
http://www.ncbi.nlm.nih.gov/pmc/articles/PMC1706009/
Monday, June 29, 2015
Summer Week 5
Week of June 22nd-25th
I haven't spent much time in lab this week. It was finals week for my math class and I needed to study. I did notice that a lot of my plates are beginning to grow some pretty lovely cultures. I now have at least 4 species of fungi growing in my plates but I am still unable to classify any of them.
I've been giving a lot of thought to where I want to take this project in the future. Depending on what I want to do my project can take me a lot of places. I could work with Cel and learn how to extract DNA and try to use that procedure on my endophytes. I could learn how to stain and identify the morphology of my fungal colonies. Or I could try and infect a different species with an endophyte and see if it changes the growth of the plant. Choices Choices
Thursday, June 25, 2015
Summer Week 4
Week of June 15th-18th
On the 3rd of June I found out that the method I was using to stain tissues to look for endophytes was not as effective as it could have been. By adding a drop of stain instead of excess alcohol when mounting my slide I am better able to see endophytic hyphae because the plant cells are not dehydrated from the alcohol. After altering my staining method I began to see more endophytes. I found three this week in silver leafed nightshade, mint and a succulent euphorbia plant.
The plates made last week began to grow endophytes and the ones from the week before continued to grow larger. The growth rate for all the colonies appears to be very slow which is a good sign they are genuine endophytes.
This week I also found a really neat new resource call the Journal of Video Experiments or JOVE. They have detailed videos of how to set up and conduct different experiments including the formulas used for the dilution of chemicals and things of that nature. One I watched was about how to inoculate plants with endophytes that kill insects. Here is the link, I don't know how to embed videos.
http://www.jove.com/video/50360/establishing-fungal-entomopathogens-as-endophytes-towards-endophytic
Summer Week 3
The week of June 8th-11th
On Monday June 8th I decided to look at any of my Show Low specimens that looked fresh enough to still absorb dye under a microscope. I looked at six specimens and only one had anything that looked like an endophyte. A big problem I was having is seeing inside the leave of plants have have a low surface area such as pine needles and juniper. The shape of the leaves requires a lot of light pass through a dense area making things blurry and dark. It was also difficult to cut the leaves so I think I need to learn how to clear plant tissues using chemicals.
On the 8th I also noticed that one of my previous plates had some white fungal growth on it. The hyphae were clearly coming out of the interior of the leaf. There has been no evidence of contamination on any of the plates so I know my new sanitation method is working well.
I found another endophyte in a sample from a tree near D building, I'm not sure what the species is. As I was walking to the lab on Monday they were trimming the trees and I picked up a sample. I think it maybe some kind of African Acacia tree but I have no idea. The leaves were so covered in debris that it was difficult to see much inside the leaves. However in more than one place I found had what looked like fruiting bodies connected to hyphae most likely on the surface of the leaf instead of inside it. I plated some samples anyway.
Summer Week 2
The week of June 1-4 was spent processing the samples I collected from 40 acres of land just outside Show Low Jordan calls Tarantula Gardens.
I went to a few different sites on the land, chose a stand of juniper trees and marked off an area 35 feet around the trees using stakes. I collected samples from various plants inside the area and took notes and photos of the plants for later reference. I had intended to do three sites and collect some of the same species of plants at all the sites to see if there was a difference in endophytic colonization in the different areas. However, after building a fence all day I was so tired it didn't really work out that way. I collected ample samples from site number three and took a few samples of different species found at site two but then I was too bushed to continue and called it a day. I figured 24 samples was plenty to work with for awhile.
I made three major mistakes when I was collecting samples in Tarantula Gardens: 1. I didn't put each sample in its own individual bag but instead placed all samples of a certain size in one bag and all samples that were smaller in another bag. Despite noting in my lab book which bag I put each sample by the time I got back to the lab I couldn't tell any of the samples apart. This was especially true with the grass samples.
2. I didn't put a damp paper towel in the bags with the samples so by the time I was able to look at many of the plants they were dried out and brittle.
3. The photos I took of the plants were blurry, out of focus and did not include enough detail to identify any of the species. I need to be using a better camera meaning not my cell phone camera.
Tarantula Gardens Site #3:
S
Summer Week 1
OK so I knew I needed to be blogging this summer, I've gotten several emails about it, but I couldn't find time with my math class. Summer classes move fast and I needed to spend as much time studying as possible. However, yesterday I had my final so now I have plenty of time to work on my blogs.
The last week of the Spring 2015 semester I made a pact with myself that I would take notes every single day that I was in the lab. I wont say that I've kept up with it 100% but I have been doing much better about keeping notes when in the lab. One day I will take beautiful, meticulous notes with ease.
I started the week by walking around campus and taking samples from some of the plants I found. I tried staining them with coomassie blue and rose bengal dye but was struggling with getting the dye to stick to the fungal mycelium and also with the rose bengal dye being too thick. I also didn't like the layout I chose for recording my notes and resolved to change it in the future.
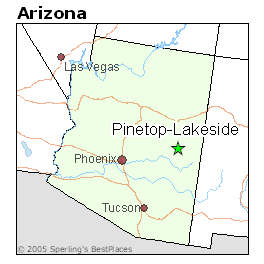
On Thursday I went to Pinetop to visit and take more samples.
Friday, May 1, 2015
Week 14
This is the last blog post for this semester! I cant believe how fast it went! I'm looking forward to the break. Now all I have to do is get through the week from hell and it will be smooth sailing from there.
This week in lab I worked on my poster some more. It looks like I've finally got it done. Its nice to have that marked off the list. Now all I need to worry about is what I'm going to say to the judges when they walk by. To be honest I'm more worried about the fifteen minute oral presentation I have to give the same day about Happiness in Animals. I should have said no to the coordinators when they asked me to do the second one. Oh well. Keep on trucking.
Friday, April 24, 2015
Week 13
Nine hours a week seems like so few sometimes. I often feel the week has flown by and little progress is being made. Then, surprisingly, we're at the end of the semester, I have at least some results, my poster is nearly done and finals are just around the corner. Its surreal that life moves forward in these little bursts of activity.
Anyway this week in lab I worked on my poster for the Estrella Mountain Conference that is rapidly approaching. It seems to be coming together quite well. It took awhile to find a layout that I liked but once I did it has been smooth sailing. I have plenty of photos, some contributed by other stem scholars (thanks Amanda Goodson!), and I really feel like its looking good. Other than a graph or table to visually represent the scant results that I do have my poster is pretty much complete. Data analysis does not appear to be one of my strong suits but luckily that's Matt's forte.
Wednesday, April 15, 2015
Week 12
This week in lab we got our Estrella Mountain proposal results back. As far as I'm aware nearly everyone got accepted. Congrats everyone! Now we have to remember the the original purpose of our research, build a poster and tell a room full of people about it as if we actually know what is going on. All without having had enough time to generate any actual results. To be completely honest this all seems a little like a farce.
For me personally this will be even more ludicrous as my English class also made me put in a proposal and that one was accepted too. I feel like I'm going to be running around like a chicken with my head cut off trying to explain things I don't understand to people who know just barely less than I do. Is this what science always feels like?
Cory and I talked and she made me see that this stuff is good practice for my real life. It can only get easier as I get more practice with these kinds of things. I really appreciated the new view point :)
Wednesday, April 8, 2015
Week 11
Just so everyone knows I title my posts so boringly because it helps me keep tract of where we are in the semester. Now I've realized that we started blogging a few weeks after the semester started so I'm lost again. All I know is that its all coming to an end pretty soon here. Thanks the gods.
This week in lab I've done more of the same. I redid my original experiment. So mostly this week I made agar, added antibiotics, sterilized plant tissues and put them on my agar plates. This way I can show that my original results were not just a fluke and perhaps even be able to isolate a few more species of endophytes.
This week I was also given a gift of a spectrophotometer. Its really old, probably from the 60's or so and I cant seem to get it to work. The light goes on but the dial doesn't register anything. I figured the % absorbance was being measured so I added food coloring to a vial but nothing changed. Does anyone know an old professor who might be able to fix my cool new toy?
Saturday, April 4, 2015
Week 10
This week in lab I mostly looked for endophytes in various different plant species. Matt and Josh helped a lot. Matt went out out gathered different kinds of desert plants and all three of us sat around attempting to find endophytes in their tissues. We found a few in mesquite and the endophyte infused grasses that I planted earlier in the semester. It took forever but Josh was finally able to get a few pictures with the ipad. This is an art that requires finesse and patience.
I also decided to rerun my orginal experiment to see if the results are the same. I sterilized and plated oleander tissues first because most of my suspected endophytes came from oleander. Next week I'll get the other two species on my list done.
I believe this is a grass blade. You can see the fungal hyphae coming out of the plnt tissue here:
Thursday, March 26, 2015
Week 9 (according to Canvas)
I find it difficult to keep track of the weeks as time marches on. I guess if its week 9 then we are axactly half way through the semester. Now we all just have to hold on, bear down and get throught the last half. I'm pulling for you all.
This week in lab I felt like I was really productive until earlier today. I finally finished and turned in my abstract for the Estrella Mountain Conference, attempted to isolate some of the fungal colonies that may be endophytes on my other plates and made more agar.
However today I realized that the water I used to dilute the antibiotic in my agar was not sterile (because I forgot and used regular DI water) which means every single one of the plates I made is also contaminated. This puts me behind in a major way so I'm rather upset with myself.
This week I also learned to melt paraffin wax and pour it into the microtome. Paraffin is stronger than the potato I was using before and has less contaminates. I made some beautifully thin specimens that were a joy to look at under the microscope. Josh found a strange structure in the oleander stems that almost looked like a corkscrew. Matt identified it as a ligated xylem vesicle used for conducting water. Or something.
Wednesday, March 11, 2015
WEEK 7
This week in lab was very colorful. The mold gardens I made last week grew spectacular fungal colonies. The rainbow of species is so awe inspiring I haven't identified any. Some look like little green hills with white, crystalline hyphea snow frosting the tops. There are black slime molds with lightning bolts of hypea diving deep into the agar for nutrients. See its stunning:
Ok so maybe you have to see it close up. I think its pretty.
Anyway this week I also noticed a white slow-growing fungi on some of the oleander stems. An endophyte needs a minnimum of two weeks to appear so the timing is perfect. Here is a photo Amanda took for me using her phone: Thanks Amanda!
I still don't really know how to identify fungi so I have no clue what kind this may be. I just really hope nothing grows over break.
Thursday, March 5, 2015
What Week is it Again?
This week in lab I finished plating my plant samples to isolate any endophytic fungi inhabiting the tissues. It feels great to get that done so that they have time for maturation. I have moved the samples to a dark cabinet as these conditions are more favorable for fungi than the incubator
I also used the agar Andrew made last fall for catching spores in various locations around the lab. Matt told me there are fungal spores in the rain so I left various agar plates open during the storm earlier this week. After the colonies grow large enough I will identify the species using a dichotomous key as practice for endophytes.
Thursday, February 26, 2015
Week 5
This was a very productive week for me in lab. Last week I finally got the dyes I was waiting for and I made agar for the first time in my life so I'm finally ready to start plating plant tissues in an attempt to isolate endophytic fungi. I plan on using three species of plants: lantana, oleander and bougainville, and three tissue types: leaves flowers and stems.
Endophytes are slow growing fungi and if the surface of the leaves or flowers I'm using have any sort of fungal spore or bacteria on it then those organisms will grow much faster than the endophyte, take over the agar and eat all the food before the endophyte has a chance to appear. To ensure that the only thing that is growing in my agar is an endophyte, I have to sterilize the surface of the tissues.
Monday I came in early to design the sterilization method I will be using on the plants for my project. The materials are first rinsed in running tap water for 5 min to remove any dirt or debris and then cut into 5mm lengths. The sections are agitated in 100% isopropyl alcohol for 2 minutes and then placed in a 1.25% bleach solution. At the intervals of 0,1,5, and 10 min four sections of tissue are removed, triple rinsed in sucessive sterile water baths and placed on an agar plate. It will take more than three weeks to see any results.
Thursday, February 19, 2015
Week 4
This week was a short week because of the holiday. All Hail the Presidents!
Anyway, Wednesday I was waiting for Rose Bengal and coomassie blue stains to come in so I didn't have much to do. I put some grass seeds in a 5% solution of sodium hydroxie to soak for eight hours to soften their cell walls enough that a stain can penetrate it. As I've read some endophytic fungi infections can be passed from the mother plant to her seeds, I was hoping to be able to see if I could find some mycelium there. Alas I forgot to take them out of solution before leaving yesterday and, after soaking all night in such a caustic solution, the seeds were nothing but mush today. I had to throw them all away and will have to try again later next week.
In better news the stains finally came in! Tooday I got to weigh out, mix and autoclave a special agar for my project this semester. I added the Rose Bengal dye to my plates as well as dilute ampicillin to select against fast growing fungi and bacteria, respectively. In addition to giving endophytic fungi a fighting chance in my agar plates, the rose bengal will be picked up by the fungal colonies making identification of any species easier.
Thursday, February 12, 2015
Week 3
Most of this week has been spent doing research for my semester project. I've decided I would like to study plant endophytic fungi this semester. Plants often have symbiotic relationships with many different organisms. Jeremy's project is looking at bacterial endophytes in roots while I will be forcusing my attention on fungal endophytes in stems, leaves and flowers.
The definition of an endophyte is a little hazy but most people agree that it is any organism, usually bacteria or fungi, that can live inside another without causing pathogenic symptoms. The endophytic organism can be a symbiote that benefits the host, like our gut bacteria that helps us absorb nutrients, or it can just be something that happens to live in the host. In some cases an organism that is a normally an endophyte can become pathogenic, such as when Staph aureus gets into a human's blood stream or if a plant begins to die.
The first plants it was proven had endophytic fungi living between their cell walls were certain species of grasses and so most of the literature is about grasses, The gentleman that was working on a similar project last semester left behind a sack full of grass seeds known to harbor endophytes and I planted some of them earlier this week. Here is a photo:
And here is one of the microtome I will be using to slice my plant samples for staining to see if I can find mycelium between the plant's cell walls. The potatoe is used to hold the sample in place so I can slice extremely thin slices off sample.
Thursday, February 5, 2015
Week 2
The entirety of my second week in S-STEM has been used trying to identify my unknown bacterial sample. Even though I took Microbiology a year ago it took me three attempts to gram stain my unknown. It could have been because I wasn't heat setting the sample long enough, and the bacteria was just washing off into the sink, or it could be that I just couldn't find them under the microscope. Either way it was a little frustrating.
Finally on the third attempt I was able to get a sample to stick and, with a little assistance from Josh, was able to locate the sample under the microscope. It was a beautifully stained gram negative bacillus bacterium. I spent the rest of the week doing all the metabolic tests necessary to discover the identity of my sample.
Here are the results of my tests:
Lactose fermentation- negative, color remained red and there was no gas produced.
Glucose fermentation- positive, the color of the phenol indicator changed from red to yellow and a small amount of gas was produced.
Tryptone indole test-positive, the media got a red ring on the top when the indole reagent was added.
Citrate test- positive, after inoculation the media changed color from green to blue.
Sulfur indole motility test- positive for both motility and sulfur reduction, the inoculation site had feathered edges and changed the media around it to a black color.
Catalase test- positive for catalase production, the sample began to bubble after adding a few drops of peroxide.
Gelatin test- negative, the gelatin became solid again after leaving it in the fridge proving the organism cannot hydrolysis gelatin.
With all this new information at my disposal I can now identify my unknown using the flow chart available. After following the chart it has been determined that my specimen is, in fact, Providencia stuartii.
Wednesday, January 28, 2015
New to S-STEM
This semester I finally decided to go back to school full time (yay!) and, because of my full time status, I can now participate in a few programs that I've had my eye on for a while. One of these programs is the S-STEM internship/scholarship that I'm writing this blog for. I'm super excited about this program because it gives me a chance to work in a lab! This lab experience will help give structure to my experiments, and access to equipment and expert personnel that I simply don't have in my little lab at home.
On Monday this week I had an interview with the lab coordinators. They told me that I will not be assigned to a professor's ongoing research but will have to build an experiment of my own. While I have given a lot of thought about what kinds of questions I want to answer in my own lab, it is a bit daunting to be asked to design one that I will be graded on, instead of just for personal pleasure.
I just realized my computer could put photos on this blog, duh. So here is a picture of some black solider fly larva. These are one of the major decomposers I find in my compost bin. I downloaded this photo off the internet almost a year ago and now I cant figure how I did that. If I could I would show a photo of the adults because they have a lovely little glass window in their thorax.
Subscribe to:
Posts (Atom)